


Hitachi ZX200-3 Seal Kit: Essential Hydraulic Cylinder Guide
The Hitachi ZX200-3 is a widely used excavator in construction, earthmoving, quarry, and general equipment applications. Like other hydraulic excavators, its boom, arm, and bucket cylinders operate repeatedly under high hydraulic pressure, contamination, heat, and changing loads.
Over time, rod seals, piston seals, buffer rings, dust seals, O-rings, and wear rings can deteriorate. The result may be external oil leakage, cylinder drift, weak holding force, or reduced hydraulic performance.
Choosing the correct Hitachi ZX200-3 hydraulic cylinder seal kit, however, requires more than simply searching for “ZX200-3 seal kit.”
The boom, arm, and bucket cylinders use different sealing arrangements, and the correct kit should be confirmed by cylinder position, part number, machine configuration, and—when necessary—actual dimensions.
FASeals offers a wide selection of hydraulic cylinder seal kits for excavators and other heavy equipment.
Quick Answer: Which Seal Kit Does a Hitachi ZX200-3 Need?
The first thing to determine is which hydraulic cylinder you are repairing.
A ZX200-3 normally has separate seal kits for:
| Cylinder | Function | Seal Kit Required |
|---|---|---|
| Boom cylinder | Raises and lowers the boom | Boom cylinder seal kit |
| Arm cylinder | Extends and retracts the arm/stick | Arm cylinder seal kit |
| Bucket cylinder | Operates the bucket linkage | Bucket cylinder seal kit |
Hitachi’s own cylinder-overhaul seal-kit literature lists separate ZX200-3 references for these three positions:
| ZX200-3 Cylinder Position | Hitachi Select Parts Reference |
|---|---|
| Arm | YA00001400PS |
| Boom | YA00001396PS |
| Bucket | YA00001392PS |
These references demonstrate an important point: a single “ZX200-3 seal kit” should not automatically be assumed to fit every cylinder on the machine.
Before ordering, always confirm the exact cylinder position and applicable part number.
ZX200-3 Bucket Cylinder Seal Kit
FASeals currently lists the:
1102306 Bucket Cylinder Seal Kit for Hitachi ZX200-3
for bucket-cylinder repair applications.
View the FASeals 1102306 Bucket Cylinder Seal Kit for Hitachi ZX200-3
The product listing identifies 1102306 specifically as a bucket-cylinder seal kit for the Hitachi ZX200-3.
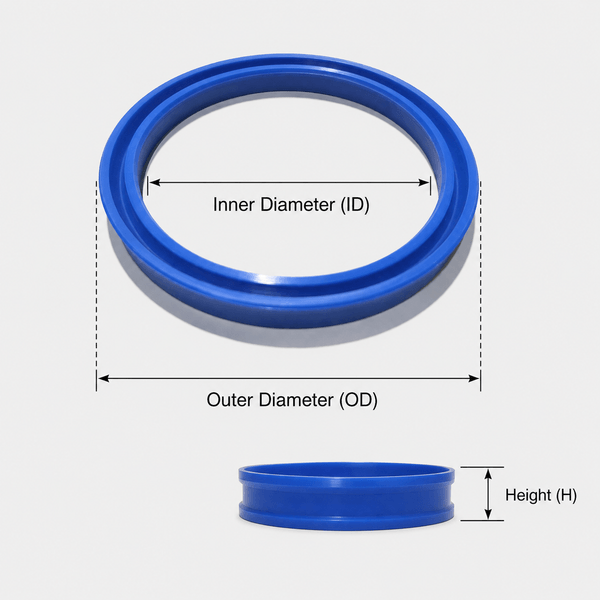
However, do not use the 1102306 kit for a boom or arm cylinder merely because the machine model is the same. Different cylinder positions can have different:
- Rod diameters
- Bore diameters
- Piston dimensions
- Gland dimensions
- Seal profiles
- Buffer arrangements
- Wear-ring sizes
Confirm the repair position before ordering.
Why the ZX200-3 Hydraulic Cylinders Need Different Seal Kits
The three main front cylinders perform very different jobs.
Boom Cylinder
The boom cylinders support a large proportion of the front attachment load.
They experience:
- High working pressure
- Heavy lifting loads
- Repeated extension and retraction
- Pressure spikes during digging
- Side loading caused by machine operation
Because there are normally two boom cylinders, both cylinders should also be inspected if one develops leakage or abnormal behavior.
Arm Cylinder
The arm—or stick—cylinder controls the inward and outward movement of the excavator arm.
It experiences heavy loading during:
- Digging
- Pulling material
- Trenching
- Loading
- Breaking compacted soil
Hitachi actually uses the ZX200-3 arm cylinder as an example in its cylinder-seal technical literature. The document describes test conditions reaching 42 MPa hydraulic pressure and 120°C hydraulic-oil temperature, illustrating the demanding environment in which cylinder seals can operate.
Bucket Cylinder
The bucket cylinder produces the curl and dump movement of the bucket.
It frequently experiences sudden load changes while:
- Breaking into soil
- Curling the bucket
- Loading trucks
- Handling rocks
- Performing demolition work
This repeated cycling can gradually wear the rod seal, buffer seal, piston seal, wiper, and guide components.
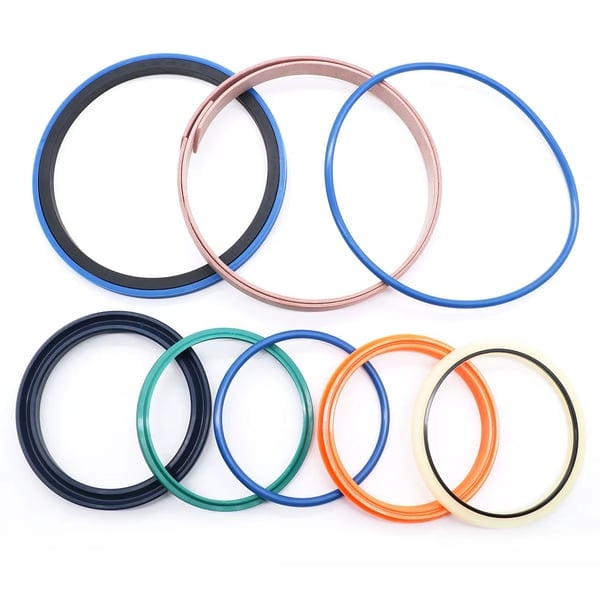
What Is Usually Included in a ZX200-3 Cylinder Seal Kit?
The exact contents vary by cylinder and kit specification.
A hydraulic cylinder repair kit may include:
| Seal Component | Main Function |
|---|---|
| Rod seal | Prevents hydraulic oil from escaping around the rod |
| Buffer seal | Protects the rod seal against pressure spikes |
| Dust/wiper seal | Prevents dirt, water, and debris entering the cylinder |
| Piston seal | Separates pressure between both cylinder chambers |
| Cushion seal | Helps control cushioning near the end of the stroke |
| Wear ring | Guides the piston and reduces metal-to-metal contact |
| O-ring | Provides static sealing |
| Backup ring | Reduces O-ring extrusion under pressure |
| Seal ring | Provides sealing between stationary or moving components |
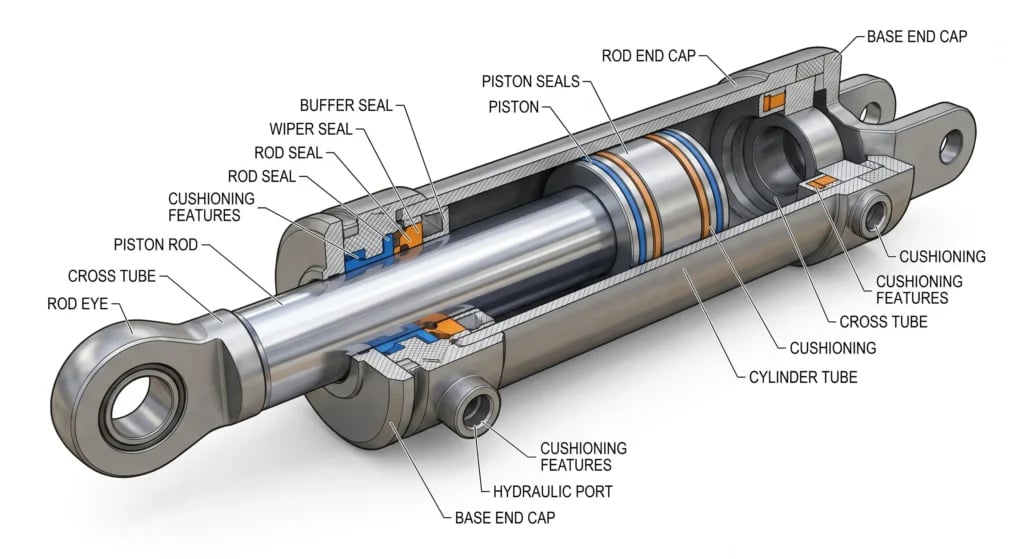
Hitachi’s ZX200-3 seal-kit illustration shows components including the rod seal, buffer ring, dust seal, cushion seal, O-ring, backup rings, and seal ring. The manufacturer also notes that kit contents differ according to machine model.
That means you should compare the new seal kit with the removed seals before assembly rather than assuming every hydraulic-cylinder kit contains exactly the same components.
Common Signs That a ZX200-3 Cylinder Needs a Seal Kit
1. Hydraulic Oil Around the Rod
Oil appearing around the cylinder gland or running down the piston rod is one of the most recognizable symptoms.
Possible causes include:
- Worn rod seal
- Damaged buffer seal
- Contaminated gland
- Scratched rod
- Bent rod
- Excessive internal pressure
Replacing the rod seal alone is not always enough.
2. Boom, Arm, or Bucket Drift
If the boom, arm, or bucket slowly moves while the control lever is in neutral, internal leakage may be occurring.
A worn piston seal can allow hydraulic oil to bypass from one side of the piston to the other.
However, cylinder drift can also originate from:
- Main control valve leakage
- Load-holding valve problems
- Port relief valve leakage
- Hose or fitting leakage
Do not automatically rebuild the cylinder without diagnosis.
3. Weak Holding Force
The cylinder may still move normally but fail to hold a heavy load.
Internal seal bypassing is one possible cause.
4. Slow Cylinder Movement
A damaged cylinder seal can reduce hydraulic efficiency, but slow operation may also result from:
- Hydraulic pump wear
- Low engine speed
- Relief-valve problems
- Restricted oil flow
- Control valve problems
- Excessive hydraulic temperature
Check the entire hydraulic circuit where necessary.
5. Damaged Dust Seal
The wiper or dust seal is the first defense against external contamination.
A torn or hardened wiper can allow:
- Sand
- Mud
- Dust
- Water
- Metal particles
to enter the gland area and damage the rod seal.
Why a New Seal Kit Sometimes Leaks Again
This is one of the most important points when repairing an older ZX200-3.
A seal kit repairs the sealing components. It does not repair damaged metal.
Repeated leakage after installing new seals may be caused by:
Scratched Piston Rod
A deep scratch can act like a cutting edge every time the rod passes through the new rod seal.
Inspect for:
- Longitudinal scratches
- Pitting
- Rust
- Chrome peeling
- Impact damage
Bent Rod
A bent rod can place uneven pressure on the gland and seals.
This may cause rapid seal wear even when the new kit was installed correctly.
Damaged Cylinder Bore
Inspect the bore for:
- Scoring
- Corrosion
- Excessive wear
- Foreign material
- Surface damage
A new piston seal cannot compensate for severe bore damage.
Damaged Seal Groove
Burrs, corrosion, or previous installation damage in the groove can cut a new seal during assembly.
Contaminated Hydraulic Oil
Particles circulating in the hydraulic system can damage sealing surfaces.
The hydraulic tank, oil, filters, and related components should be inspected if contamination is suspected.
What to Inspect Before Installing New Seals
After removing and disassembling the cylinder, inspect more than just the old seals.
Piston Rod
Check:
- Straightness
- Chrome condition
- Scratches
- Pitting
- Rust
- Thread condition
- Impact marks
Cylinder Barrel
Check:
- Bore finish
- Scoring
- Corrosion
- Distortion
- Contamination
Piston
Inspect:
- Seal grooves
- Wear-ring surfaces
- Retaining hardware
- Surface damage
Cylinder Head / Gland
Check:
- Rod guide surface
- Seal grooves
- Threads
- Bushings
- Wiper-seat condition
FASeals also supplies broader hydraulic cylinder components and sealing solutions for cylinder repair and maintenance applications. The site’s cylinder section covers seal kits as well as rods, barrels, piston-related components, and other repair parts.
How to Identify the Correct ZX200-3 Seal Kit
Use this order of identification whenever possible.
1. Confirm the Complete Machine Model
Do not send only:
Hitachi ZX200
Confirm whether the machine is:
- ZX200
- ZX200-3
- ZX200LC-3
- ZX200-3G
- Another regional or special configuration
Similar model names do not automatically mean identical cylinders.
2. Confirm Cylinder Position
Specify:
BOOM
or:
ARM / STICK
or:
BUCKET
This immediately eliminates many incorrect kits.
3. Find the Cylinder Assembly Number
Look around the:
- Cylinder barrel
- Cylinder head
- Mounting area
- Identification label
- Stamped areas
Clean the surface before photographing it.
4. Check the Existing Seal Kit Number
If the old kit packaging is still available, photograph:
- OEM number
- Barcode
- Manufacturer reference
- Machine/application label
5. Confirm Machine Serial Number
Serial-number ranges can matter when a manufacturer changes cylinder suppliers or revisions during production.
6. Measure the Cylinder When Numbers Are Missing
Useful dimensions include:
- Rod diameter
- Bore diameter
- Piston diameter
- Gland diameter
- Seal groove dimensions
Do not rely only on a distorted used seal if proper cylinder measurements are available.
Part Number Reference Table
The following references can be useful when researching ZX200-3 cylinder kits.
| Reference | Application / Source |
|---|---|
| YA00001400PS | ZX200-3 arm cylinder seal kit — Hitachi Select Parts |
| YA00001396PS | ZX200-3 boom cylinder seal kit — Hitachi Select Parts |
| YA00001392PS | ZX200-3 bucket cylinder seal kit — Hitachi Select Parts |
| 1102306 | ZX200-3 bucket cylinder seal kit listed by FASeals |
The first three references appear in Hitachi’s official cylinder-overhaul seal-kit literature. The 1102306 bucket-cylinder kit is currently listed in the FASeals catalog specifically for the Hitachi ZX200-3.
Part numbers should still be checked against the actual machine and cylinder before shipment.
Recommended Cylinder Seal Installation Procedure
Hydraulic cylinders can contain trapped pressure and support extremely heavy machine structures. Follow the machine service procedure and proper workshop safety practices before removal.
A typical repair workflow includes:
Step 1: Park and isolate the excavator
Lower the attachment safely and relieve hydraulic pressure.
Step 2: Clean the cylinder exterior
Prevent mud and debris entering the hydraulic system during removal.
Step 3: Mark hydraulic connections
Photograph hose and fitting positions.
Step 4: Remove the cylinder safely
Use adequate lifting and supporting equipment.
Step 5: Clean the repair area
Cylinder assembly should be performed in a clean environment.
Step 6: Disassemble the cylinder
Avoid damaging threads, sealing surfaces, and the piston rod.
Step 7: Remove the old seals
Use tools that will not scratch the seal grooves.
Step 8: Inspect all hard parts
Do not install new seals over damaged rods, bores, pistons, or glands without addressing the cause.
Step 9: Compare old and new seals
Check:
- Profile
- Diameter
- Width
- Quantity
- Material
- Orientation
Step 10: Lubricate the seals
Use clean compatible hydraulic fluid or approved assembly lubricant.
Step 11: Install seals in the correct direction
Rod seals, buffer seals, and certain piston seals have pressure-facing orientations.
Installing them backwards can cause immediate leakage.
Step 12: Protect seals during assembly
Use suitable installation sleeves or protective material when passing seals over:
- Threads
- Sharp shoulders
- Ports
- Splines
Step 13: Reassemble to specification
Follow appropriate tightening and assembly procedures.
Step 14: Reinstall the cylinder
Reconnect hoses in their original locations.
Step 15: Start at low load
Cycle the cylinder slowly to remove trapped air.
Step 16: Inspect for leaks
Check the:
- Rod seal
- Gland
- Hose connections
- Cylinder ports
before returning the machine to heavy operation.
Should You Replace One Seal or Use a Complete Kit?
If the cylinder has already been disassembled for repair, replacing only the visibly leaking rod seal may not always be economical.
Other seals may already be:
- Hardened
- Worn
- Flattened
- Heat-damaged
- Contaminated
A complete cylinder repair kit can reduce the likelihood of reopening the cylinder shortly afterward.
However, the decision still depends on:
- Cylinder condition
- Maintenance history
- Seal condition
- Parts availability
- Machine downtime
Before Ordering Checklist
Send the following information when requesting a Hitachi ZX200-3 hydraulic cylinder seal kit:
Machine Brand: Hitachi
Machine Model: ZX200-3
Machine Serial Number:
Cylinder Position: Boom / Arm / Bucket
Cylinder Part Number:
Seal Kit Part Number:
Rod Diameter:
Cylinder Bore Diameter:
Required Quantity:
Delivery Country:
Also send clear photographs of:
- Machine identification plate
- Complete cylinder
- Cylinder part number
- Old seal kit label
- Removed seals if already disassembled
- Piston rod condition
The more identification information available, the lower the risk of selecting the wrong kit.
FAQs:
Does one Hitachi ZX200-3 seal kit fit the boom, arm, and bucket cylinders?
No. These cylinders use different components and seal arrangements. Hitachi lists different seal-kit references for the ZX200-3 arm, boom, and bucket cylinders.
What seal kit does the ZX200-3 bucket cylinder use?
FASeals currently lists 1102306 as a bucket cylinder seal kit for the Hitachi ZX200-3.
Can I order using only “ZX200-3”?
It is better to also provide the cylinder position, cylinder part number, machine serial number, and photos.
Is the arm cylinder the same as the stick cylinder?
Yes. In excavator terminology, arm cylinder and stick cylinder commonly refer to the same front hydraulic cylinder.
Will a new seal kit repair a scratched piston rod?
No. Deep scratching, pitting, chrome damage, or bending should be corrected before installing new seals.
Why does my ZX200-3 boom still drift after replacing the seals?
Possible causes include:
- Internal cylinder leakage
- Incorrect seal installation
- Bore damage
- Control valve leakage
- Port relief valve problems
- Another hydraulic-system fault
Further hydraulic testing may be necessary.
Can used seals be measured to identify a kit?
Yes, but old seals can swell, shrink, flatten, or deform. Cylinder dimensions and original part numbers are generally more reliable.
Find the Correct Hitachi ZX200-3 Hydraulic Cylinder Seal Kit
Correct identification is the most important step when purchasing a Hitachi ZX200-3 hydraulic cylinder seal kit.
Before ordering, confirm:
- Complete machine model
- Machine serial number
- Boom, arm, or bucket position
- Cylinder assembly number
- Seal kit reference
- Rod and bore dimensions when required
- Clear photographs
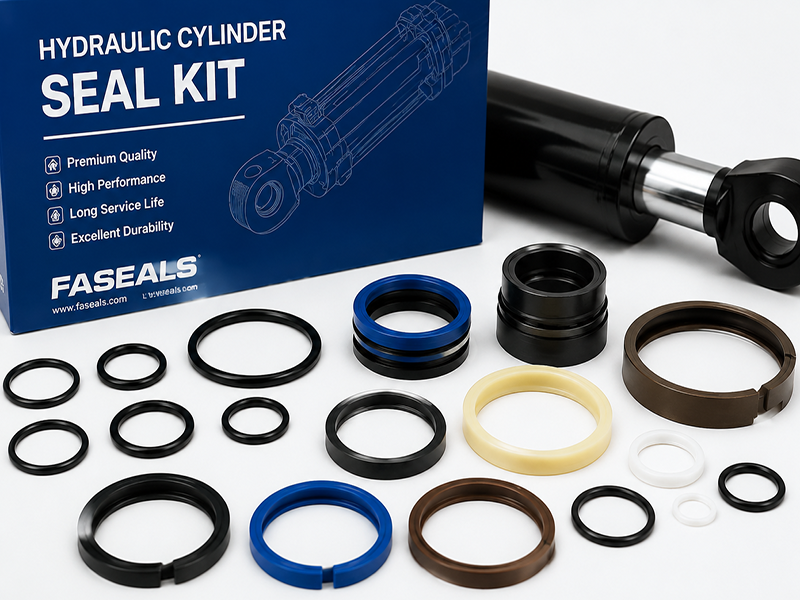
For a ZX200-3 bucket-cylinder repair, you can review the 1102306 Bucket Cylinder Seal Kit for Hitachi ZX200-3 currently listed by FASeals.
You can also browse the full FASeals Hydraulic Cylinder Seal Kit range or contact FASeals for fitment confirmation before ordering. The FASeals contact page accepts machine and application information and provides WhatsApp and email contact options.
Related posts

Volvo EC210 Hydraulic Cylinder Seal Kit: 7 Essential Tips
The Volvo EC210 series is a medium-sized crawler excavator widely used in earthmoving, road construction, foundation excavation, and bu...

Komatsu PC2000-8 Repair Kits: A Complete Guide for Backhoe and Loading Shovel Excavators
The Komatsu PC2000-8 is a large mining hydraulic excavator widely used in open-pit mines, quarries, large-scale earthmoving projects, a...

Furukawa Breaker Diaphragm: Structure, Function, Selection and Maintenance Guide
The Furukawa breaker diaphragm is installed inside the accumulator chamber. Its main function is to separate hydraulic oil from nitroge...